Stop Wasting Square Footage: Clever Second Lives for Your Home's Forgotten Corners
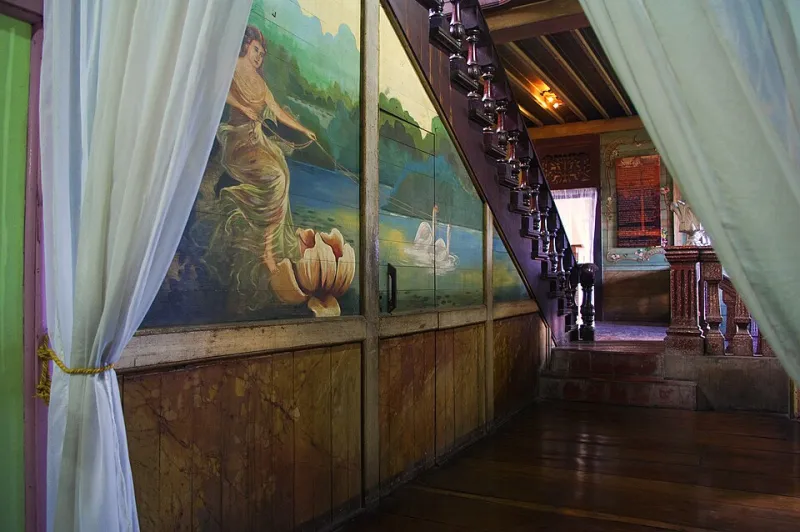
Photo: Zernan2014, CC BY-SA 3.0, via Wikimedia Commons
The Square Footage You're Paying For and Never Using
Run the numbers on the average American home and you'll find something uncomfortable: a meaningful chunk of what you're mortgaging does nothing. The space under the stairs. The alcove that's too shallow for furniture and too deep to ignore. The hallway that's six feet wide for no reason anyone can explain.
Real estate folks call it "dead space." We call it opportunity — because unlike adding a room addition, reclaiming square footage you already own is one of the few home projects where the footprint is free. You're just deciding to use what's there.
Here's a zone-by-zone breakdown, with options at three price tiers: DIY, mid-range, and hire-it-out.
The Under-the-Stairs Cavity
That triangular void beneath your staircase is often 20–40 square feet of drywalled nothing. In many homes it's the largest unused volume in the house.
DIY (under $200): Pull off the access panel (or cut one in, if you're comfortable with a drywall saw) and turn it into organized storage. Add shallow plywood shelving that follows the slope of the stairs — perfect for holiday decor, luggage, or the sporting equipment cluttering your garage. A battery puck light makes it usable.
Mid-range ($400–1,000): Build it out as a dedicated zone: a kid's playhouse with a curtained entrance, a pet crate nook with a cushion and food station, or a coat-and-bag drop zone if your staircase sits near the entry.
Pro-installed ($1,500–5,000): If your staircase borders the kitchen or living room, a contractor can open the wall and build custom cabinetry — a wine rack, a built-in bookcase, even a compact powder room in larger configurations. This is the priciest route but adds genuine resale appeal.
The Awkward Alcove
Every floor plan has one: a recessed nook beside the fireplace, the bump-out near the bedroom door, the niche next to the fridge that's too narrow for a bookshelf.
DIY (under $150): A floating shelf or two plus a plug-in sconce turns any shallow alcove into a display niche. Paint the back wall a bold accent color first — deep green and navy both photograph beautifully and cost one sample can.
Mid-range ($200–600): Go vertical with a ladder-style shelf or a built-in-look bookcase from IKEA with trim added to fake a custom fit. In a bedroom alcove, a cushioned storage bench with a throw pillow stack makes an instant reading corner.
Pro-installed ($800–2,500): A carpenter can panel and light the alcove as an architectural feature — fluted wood panels, a picture light, a marble-topped console. It's the difference between "that weird recess" and "the moment people remember."
The Wide Hallway
A hallway wider than four feet is wasted circulation space — you're walking through a room without using it as one.
DIY (under $100): Treat it like a gallery. A runner rug defines the space, and a row of frames (thrift-store art works fine) turns the walk into something. A slim console table against one wall gives you a drop zone.
Mid-range ($300–900): If the hallway is truly wide — five feet or more — a shallow built-in bench with hooks above creates a mudroom where none existed. Add woven baskets underneath and it earns its keep daily.
Pro-installed ($1,200–4,000): The ambitious move: wall off part of an extra-wide hallway to steal square footage for an adjacent closet or laundry nook. This requires framing, drywall, and usually an electrician, but in tight homes it can conjure a pantry out of thin air.
The Landing Strip (Stair Landings and Top-of-Stairs Wastelands)
That landing halfway up, or the dead zone at the top of the stairs, tends to become a museum of things that are going downstairs "eventually."
DIY (under $100): A small bench or stool with a basket underneath turns the landing into a purposeful pause point — a spot to set down groceries or lace your shoes. A wall hook or two keeps bags off the floor.
Mid-range ($250–800): Install a window-adjacent desk if the landing has natural light — a laptop perch in a quiet corner of the house is worth more than most people realize. Alternatively, a slim bookcase plus a reading chair makes it a micro-library.
Pro-installed ($1,000–3,500): On larger landings, contractors can add a built-in window seat with storage drawers, or rework the railing to open the space into a small home office alcove.
Before You Start: Three Quick Reality Checks
- Check your walls. Before opening any under-stairs cavity, verify what's inside — plumbing vents and HVAC chases love to hide there. A $50 stud finder with AC detection pays for itself.
- Permits matter for structural work. Anything involving framing, electrical, or plumbing usually needs one. Cosmetic shelving doesn't.
- Match the finish level of your home. A $5,000 custom nook in a starter house won't return its cost. Spend proportionally.
The Bottom Line
You already bought this square footage. Every one of these projects — even the pro-tier ones — costs a fraction of adding on, and the DIY versions cost less than a nice dinner. The hallway isn't going to renovate itself.